Woodworker's Journal 2004 Summer, страница 66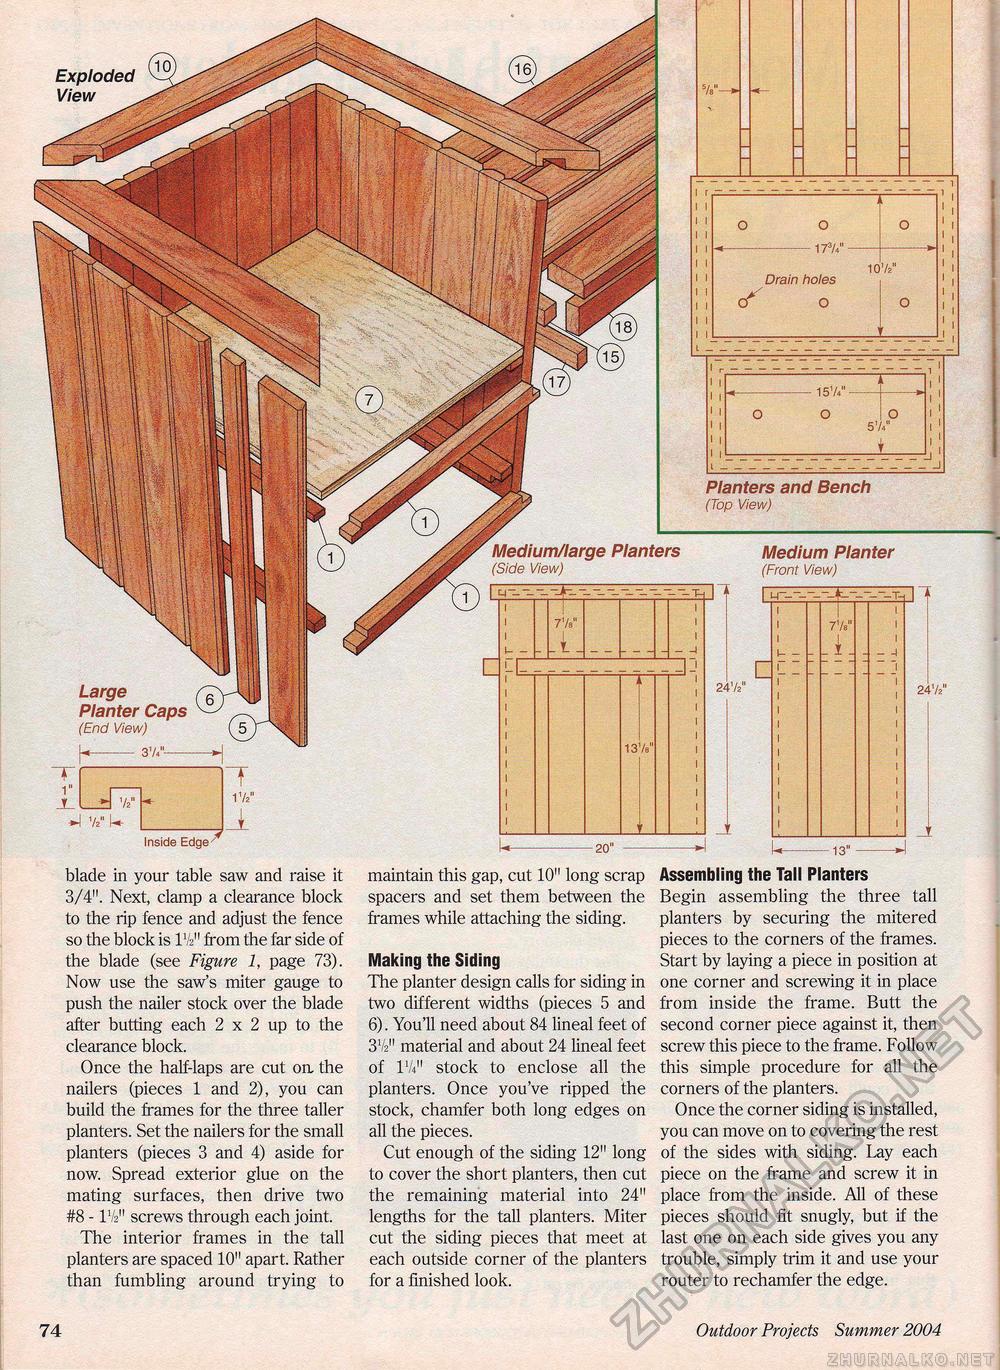
74 Outdoor Projects Summer 2004 £ Exploded View Planters and Bench (Top View) Large Planter Caps (End View) - 31/4"- Inside Edge^ blade in your table saw and raise it 3/4". Next, clamp a clearance block to the rip fence and adjust the fence so the block is IV2" from the far side of the blade (see Figure 1, page 73). Now use the saw's miter gauge to push the nailer stock over the blade after butting each 2 x 2 up to the clearance block. Once the half-laps are cut on the nailers (pieces 1 and 2), you can build the frames for the three taller planters. Set the nailers for the small planters (pieces 3 and 4) aside for now. Spread exterior glue on the mating surfaces, then drive two #8 - IV2" screws through each joint. The interior frames in the tall planters are spaced 10" apart. Rather than fumbling around trying to -20" - maintain this gap, cut 10" long scrap spacers and set them between the frames while attaching the siding. Making the Siding The planter design calls for siding in two different widths (pieces 5 and 6). You'll need about 84 lineal feet of 3V2" material and about 24 lineal feet of IV*" stock to enclose all the planters. Once you've ripped the stock, chamfer both long edges on all the pieces. Cut enough of the siding 12" long to cover the short planters, then cut the remaining material into 24" lengths for the tall planters. Miter cut the siding pieces that meet at each outside corner of the planters for a finished look. -13"-»-! Assembling the Tall Planters Begin assembling the three tall planters by securing the mitered pieces to the corners of the frames. Start by laying a piece in position at one corner and screwing it in place from inside the frame. Butt the second corner piece against it, then screw this piece to the frame. Follow this simple procedure for all the corners of the planters. Once the corner siding is installed, you can move on to covering the rest of the sides with siding. Lay each piece on the frame and screw it in place from the inside. All of these pieces should fit snugly, but if the last one on each side gives you any trouble, simply trim it and use your router to rechamfer the edge. Medium/large Planters (Side View) Medium Planter (Front View) ZIK ............. 17V Drain holes 0* o |


